Organizer Guide
Creating a conference is the first step in managing submissions, reviewers, and the peer-review process on our platform.
Follow the steps below to set up your conference.
Step 1: Access the Conference Creation Form
After signing in as an Organizer, navigate to your Organizer Dashboard and select Create Conference.
You will be asked to provide basic information about your conference.
Step 2: Enter Conference Information
Complete the required conference details, including:
- Conference Title
- Short Name or Acronym
- Conference Description
- Organizer Institution
- Contact Email
- Conference Website (optional)
Please ensure that all information is accurate before submission.
Step 3: Configure Important Dates
Set the key dates for your conference, such as:
- Submission Opening Date
- Submission Deadline
- Review Deadline
- Notification of Decision Date
- Camera-Ready Submission Deadline
These dates will be used throughout the conference workflow.
Step 4: Configure Submission Settings
Define how authors will submit papers to your conference.
Examples include:
- Accepted file formats (PDF, DOCX, etc.)
- Maximum file size
- Review model (Single-Blind or Double-Blind)
- Number of reviewers per paper
- Revision rounds
Step 5: Configure Optional Features
Depending on your conference requirements, you may enable additional features such as:
- Payment receipt upload and verification
- Camera-ready submissions
- Multiple submission tracks or topics
- Custom submission fields
Step 6: Create the Conference
After completing all required information, click Create Conference.
Your conference will be created immediately and will appear in your Organizer Dashboard.
You may continue configuring settings and managing your conference at any time before submissions begin.
Step 7: Add Reviewers
Before assigning papers for review, add reviewers to your conference.
Only registered users can be assigned as reviewers.
Step 8: Start Receiving Submissions
Once your conference is configured and the submission period begins, authors can submit papers through the conference page.
You can monitor submissions, assign reviewers, and track review progress from your dashboard.
Chair Managers
Conference Managers assist the Conference Chair in managing the peer-review process and conference operations.
To add a Chair Manager, enter the email address of an existing registered user and assign the Chair Manager role.
Chair Managers can manage submissions, assign reviewers, monitor review progress, process revisions, and manage review decisions. However, they cannot modify conference settings, deadlines, ownership, or other conference configuration options.
All conference settings remain under the control of the Conference Chair (Organizer).
How to Add a Conference Manager
- Enter the email address of a registered user.
- Confirm the assignment.
- The user will receive a notification email with Conference Manager access details.
- Once assigned, the Conference Manager can assist with submission management, reviewer assignments, review decisions, revisions, and camera-ready processing.
A Chair Manager may:
- View submissions
- Assign reviewers
- Monitor review progress
- Manage review decisions
- Process revisions and camera-ready submissions
A Chair Manager may not:
- Modify conference settings
- Change conference deadlines
- Manage conference ownership
- Delete the conference
To assign a Chair Manager, navigate to the Chair Managers section, enter the email address of an existing registered user, and confirm the assignment. The selected user will receive a notification email and gain access to the conference management functions permitted by their role.
The Conference Chair remains responsible for all conference configuration settings and overall conference administration.
Step-by-Step Guide
Step 1: Submit Your Conference Information
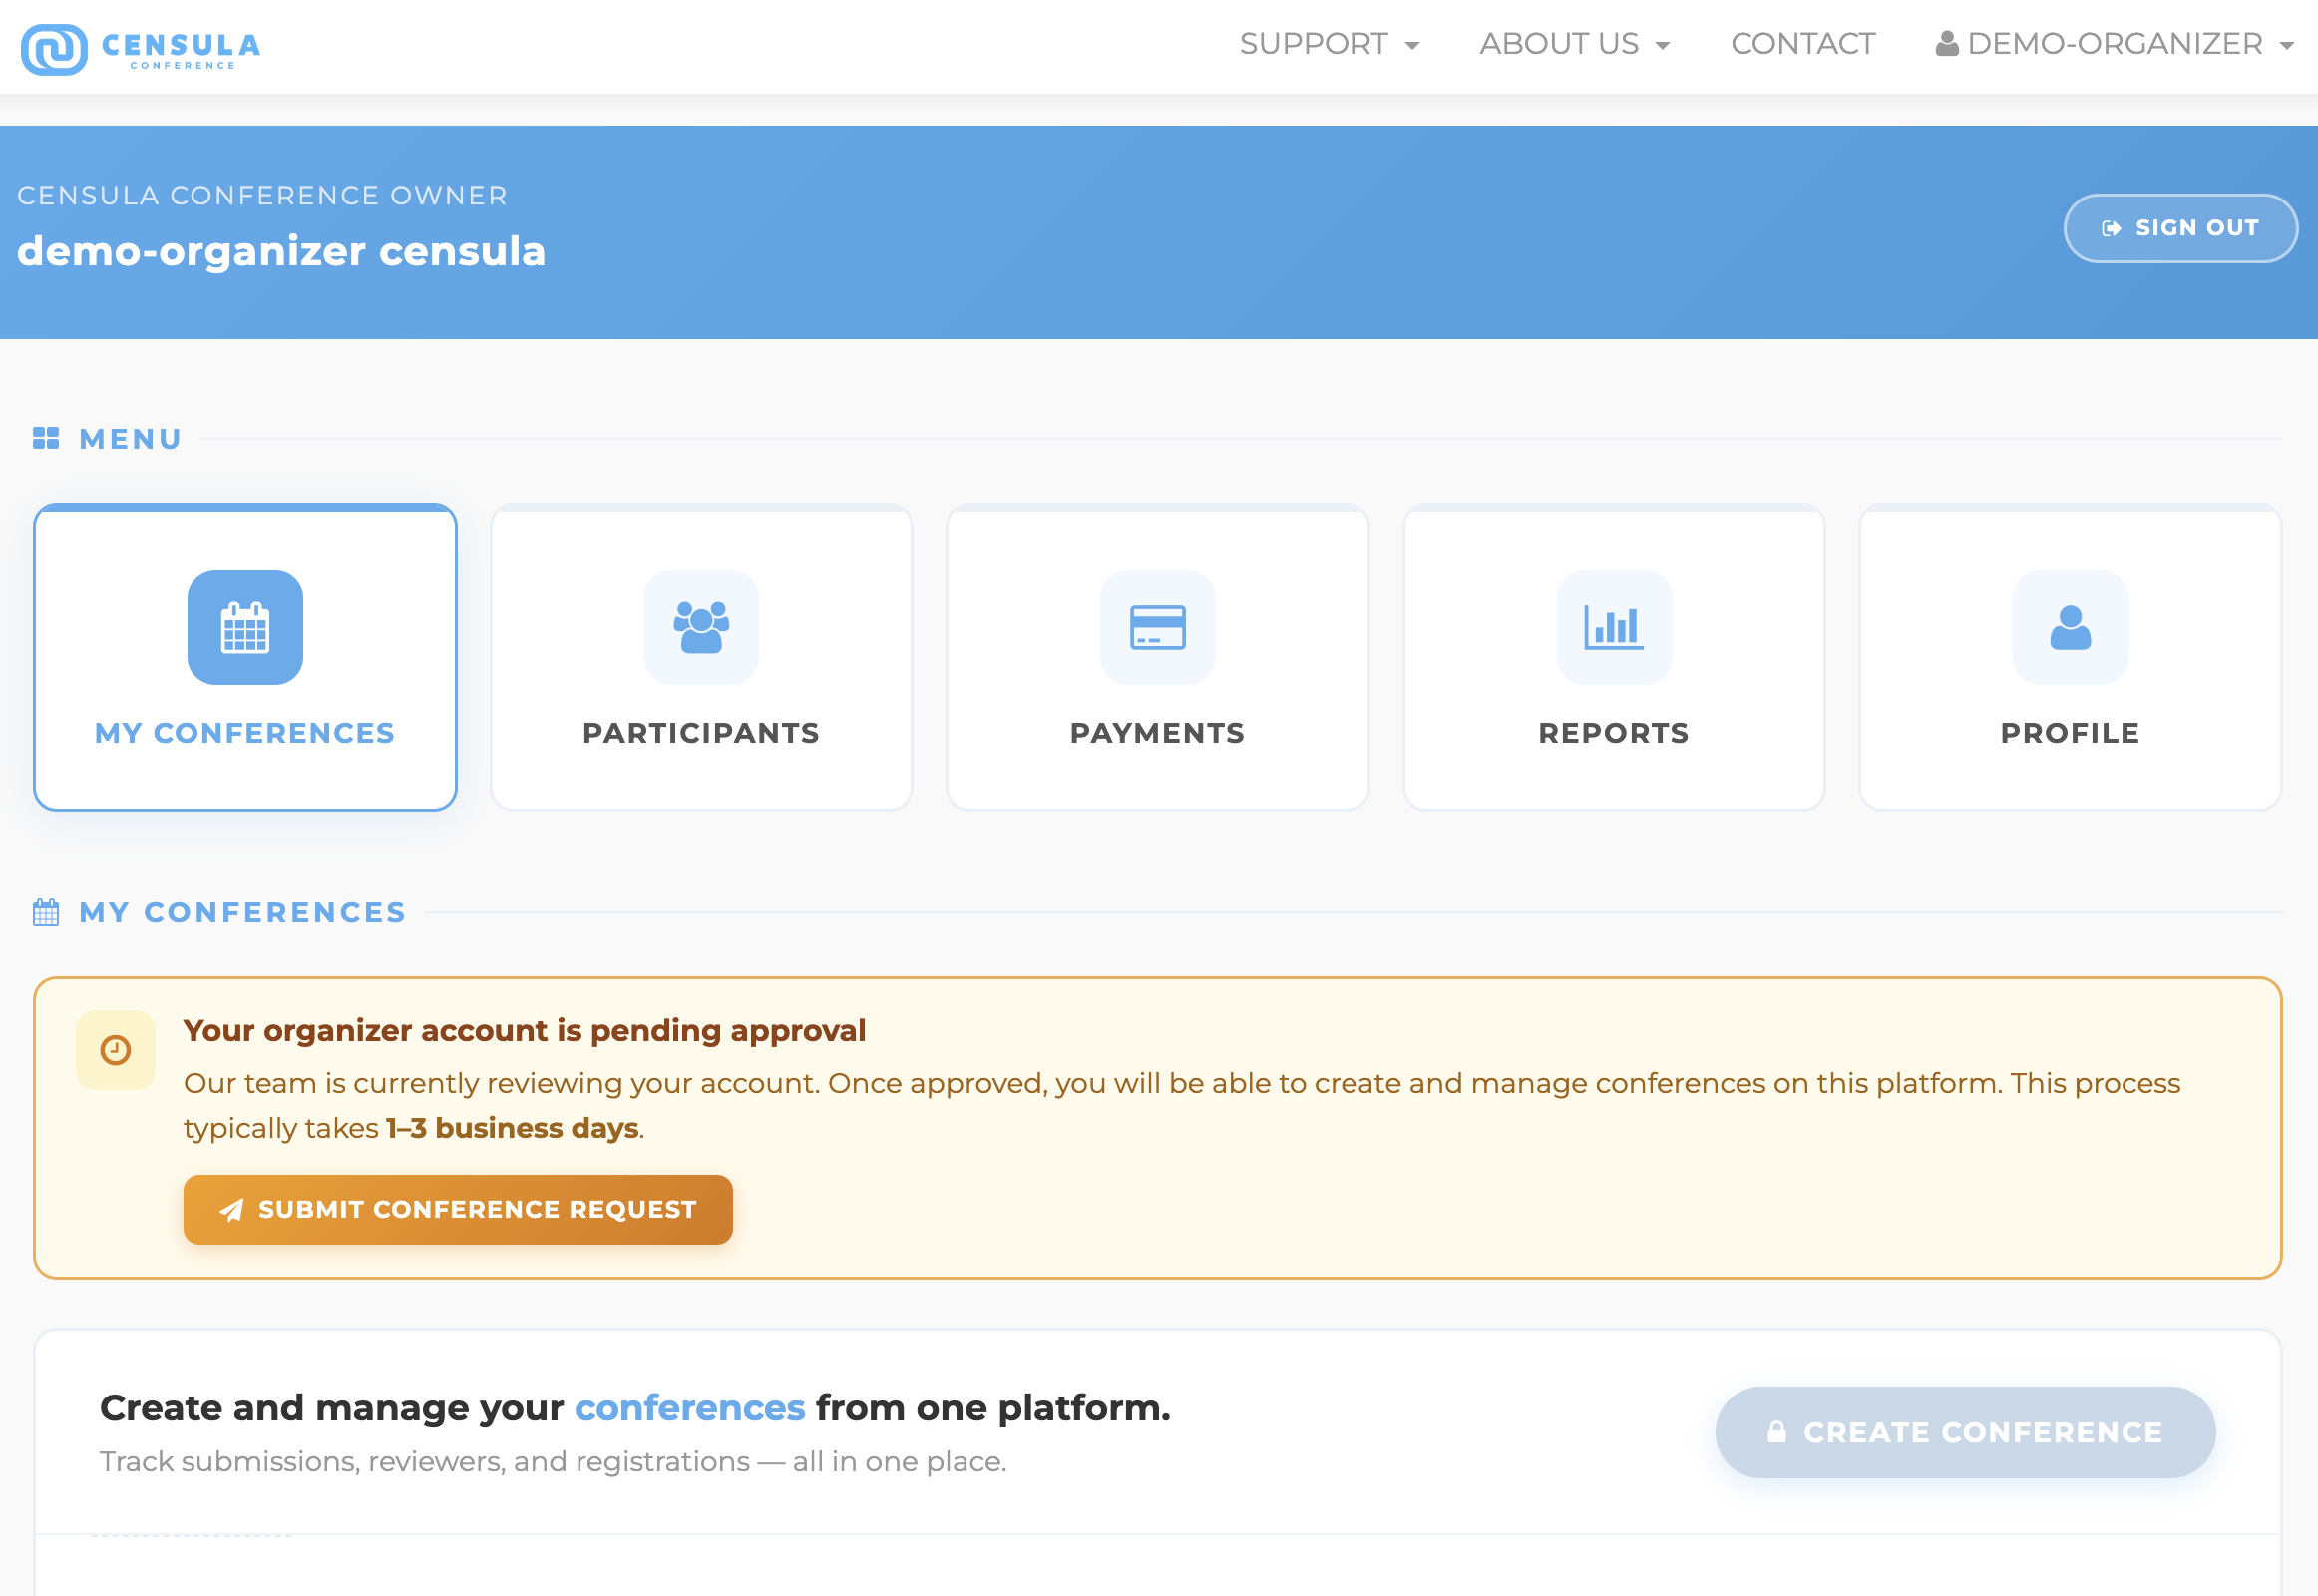
After logging in, click your name in the top-right corner and select Dashboard.
In the My Conferences section, the Create Conference button will remain disabled until you submit your conference information. To get started, click Submit Conference Request and complete the required details.
Once your information has been submitted, you will be able to create your conference using the Create Conference button.
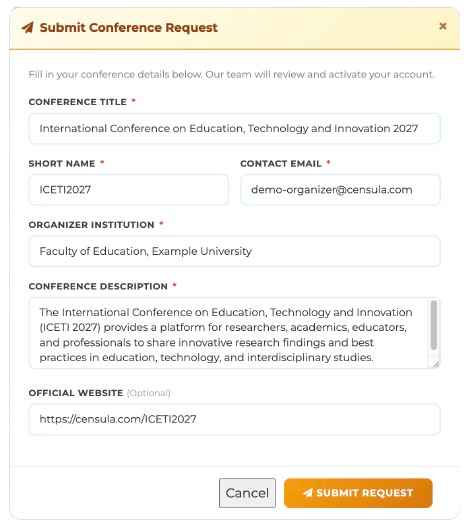
Step 2: Submit Your Conference Request
Click the Submit Conference Request button to open the conference information form, as shown below.
Complete all required fields, including your conference title, acronym, organizer information, conference dates, and other relevant details. Please ensure that all information is accurate before submission.
Once you have completed the form, click Submit Request.
After your request has been successfully submitted, the Create Conference button in the My Conferences section will become available, allowing you to create and manage your conference.
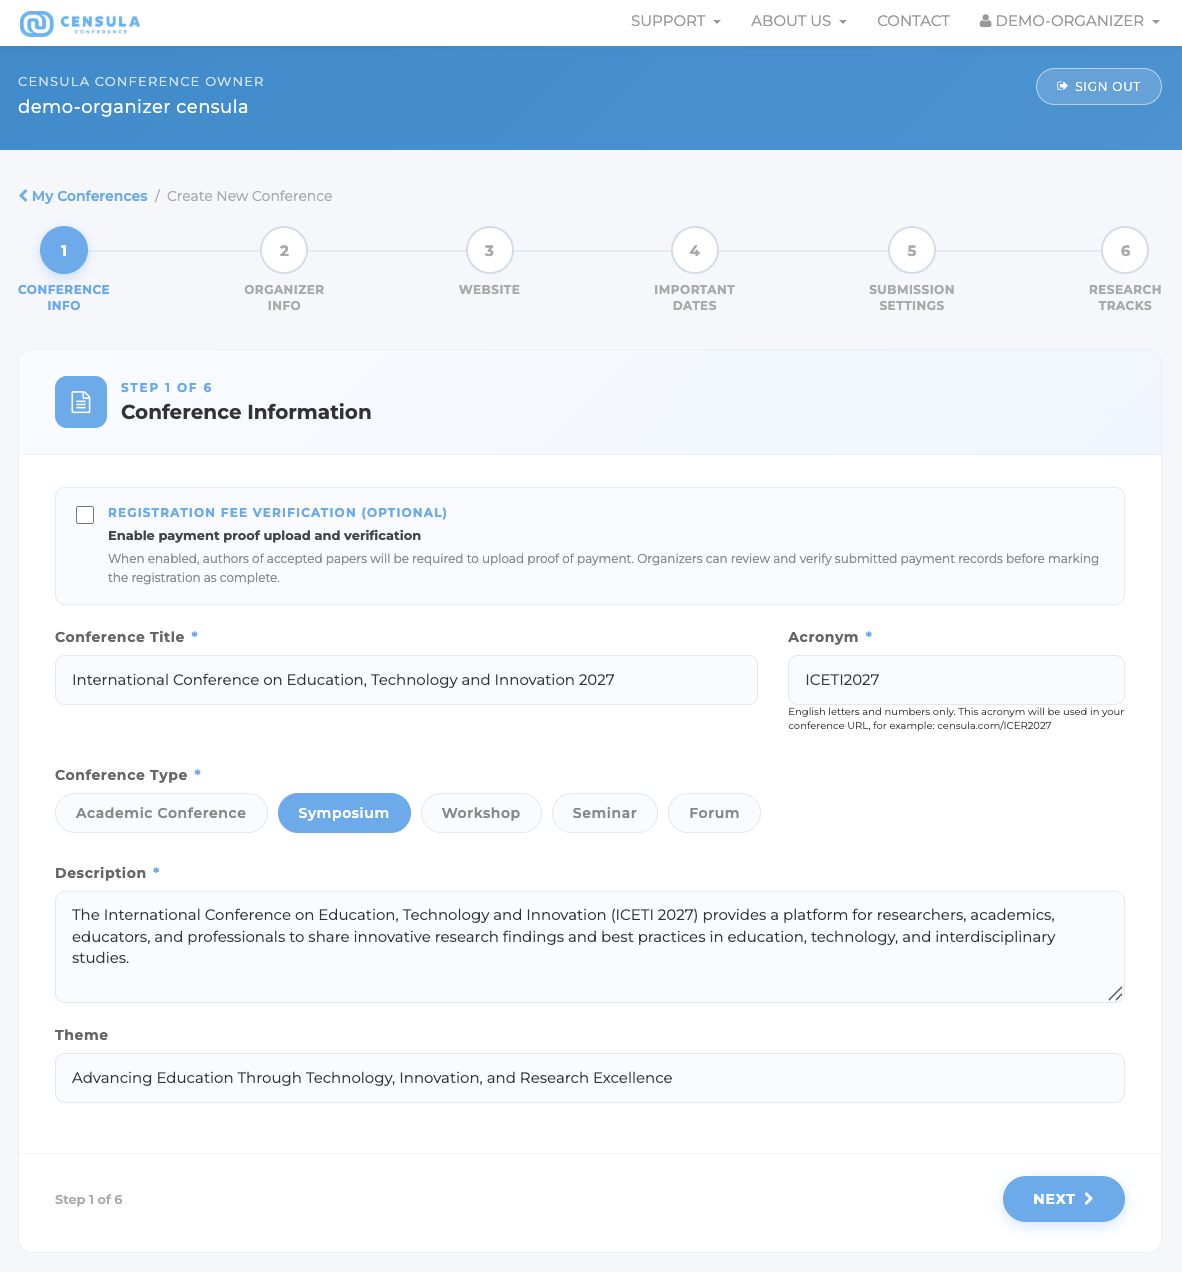
Step 3: Configure Conference Information
After clicking the Create Conference button, you will be redirected to the Conference Information page (Step 1 of 6) where you can begin setting up your conference.
If your conference requires authors to submit proof of payment, enable the Registration Fee Verification (Optional) option. When enabled, authors will be required to upload a payment slip during the registration process. If your conference does not charge a registration fee, you may leave this option unchecked.
Complete the conference information form according to your conference requirements. You may refer to the example shown below when entering the details.
Once all required information has been completed, click Next to continue to the next step.
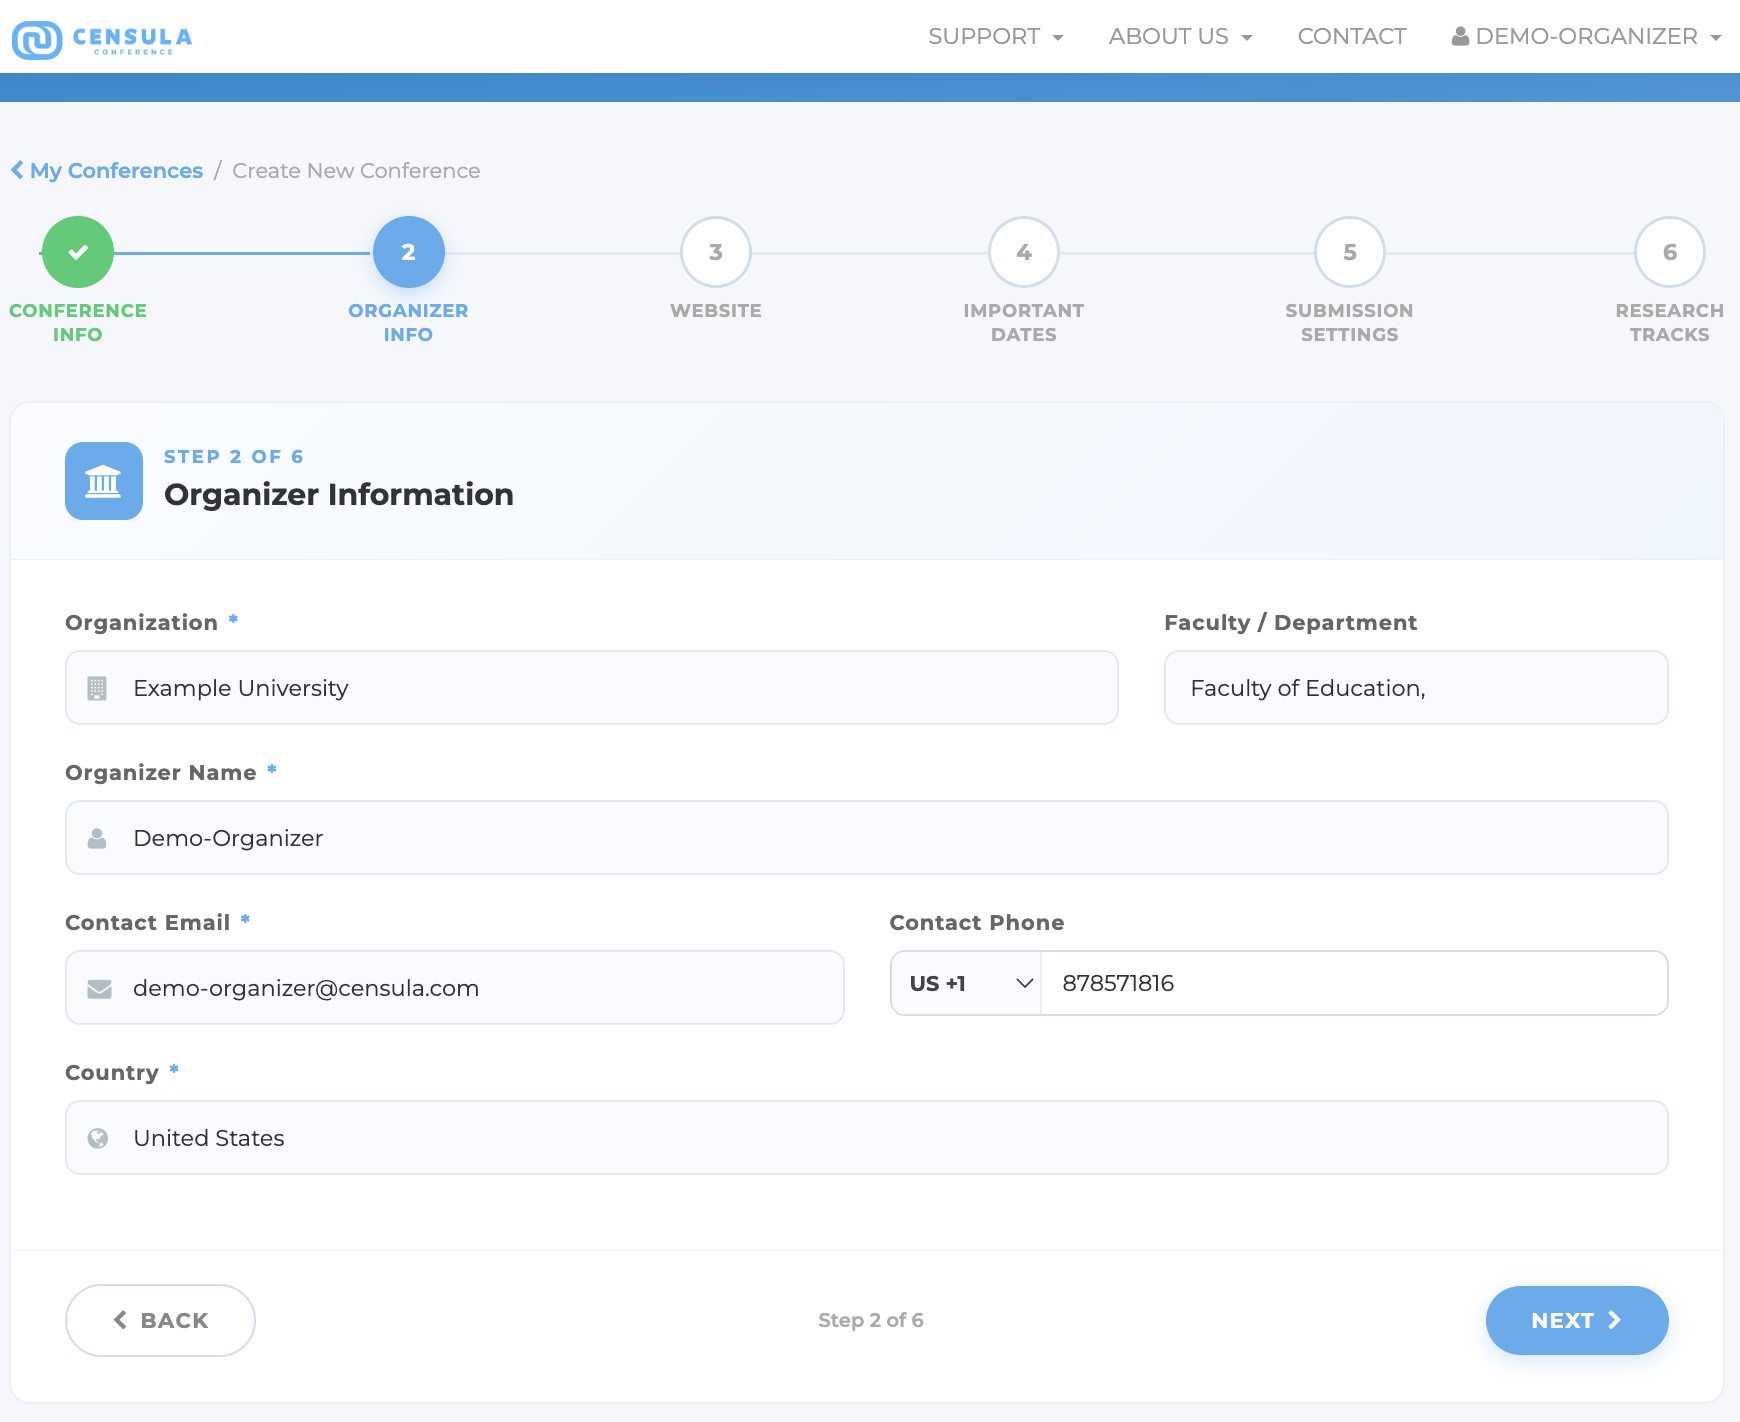
Step 4: Configure Organizer Information
Provide details about the organizing institution, including the Organization, Faculty / Department, Organizer Name, Contact Email, and any other required contact information. These details will be displayed to participants and used for conference-related communications.
Please ensure that the contact email address is valid and actively monitored, as important notifications from authors, reviewers, and participants may be sent to this address.
Refer to the example below when completing the organizer information form, then click Next to continue.
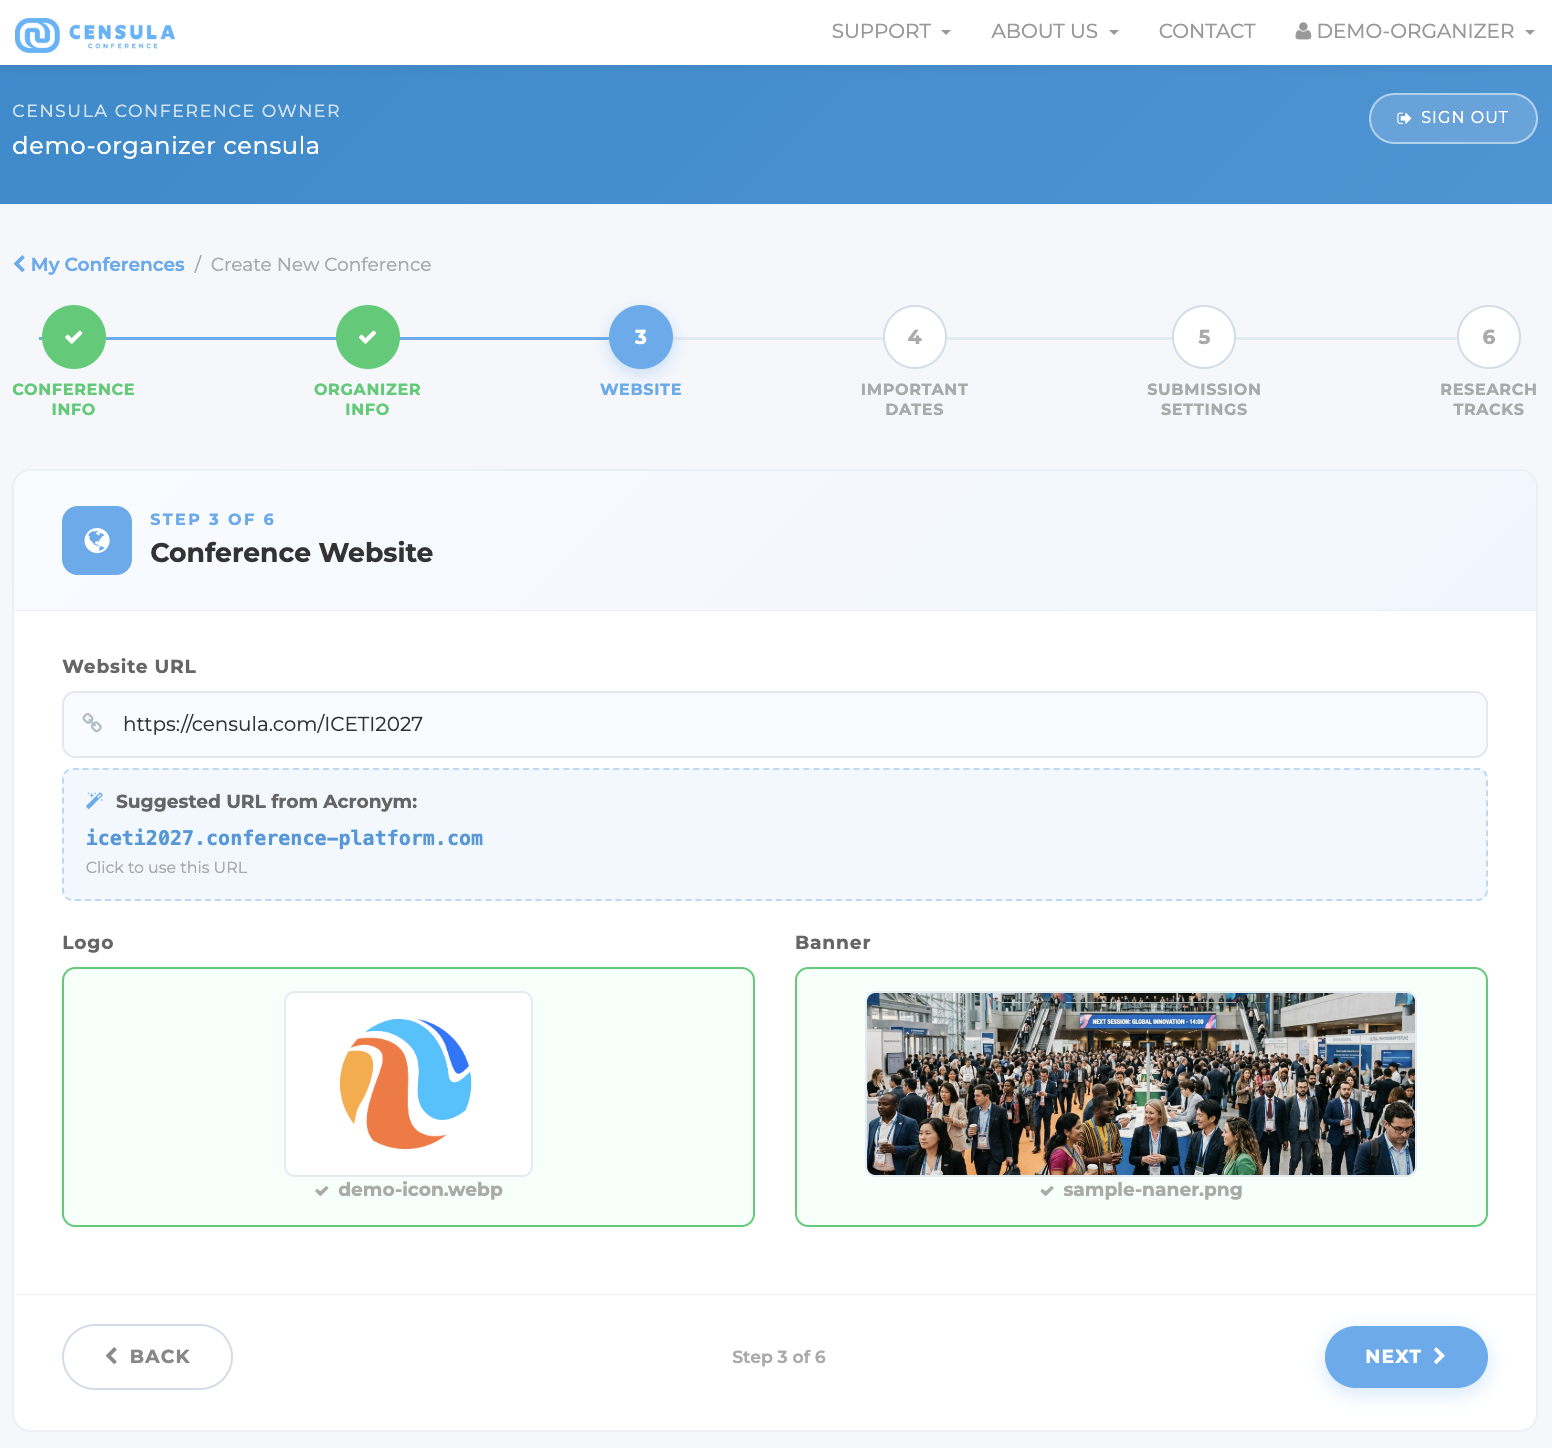
Step 5: Configure Conference Website
Upload your conference Logo and Banner to create a professional and recognizable conference page. The logo will be displayed throughout the conference website, while the banner will appear prominently on the conference homepage.
You may also enter additional website information, such as a conference description, theme, or welcome message, depending on your conference requirements.
For the best display quality, use clear, high-resolution images and ensure that your logo and banner accurately represent your conference or organization. then click Next to continue.
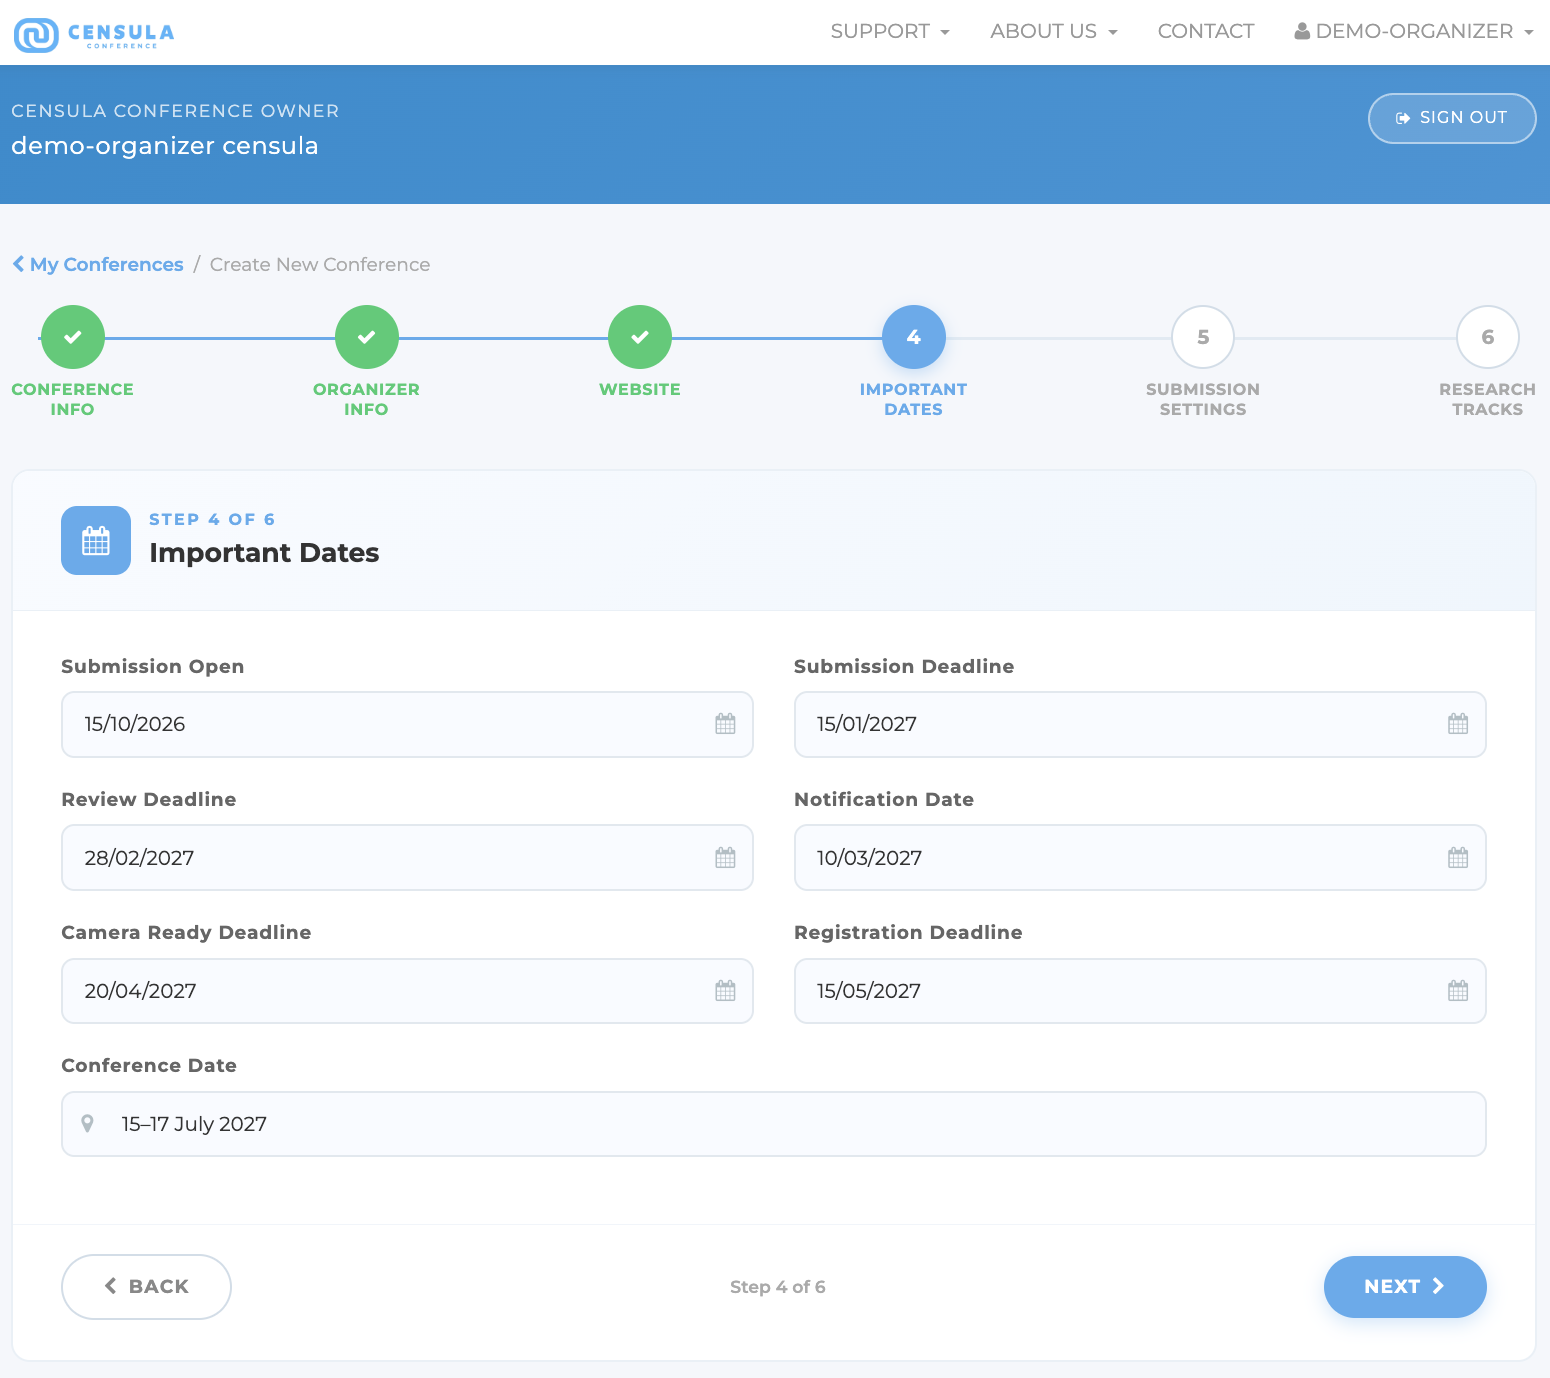
Step 6: Configure Conference Schedule
Enter the conference schedule, including key milestones such as Submission Opening Date, Submission Deadline, Review Period, Notification of Acceptance, Revision Deadline, Camera-Ready Submission Deadline, Registration Deadline, and the Conference Dates.
These dates will be used throughout the conference workflow and displayed to authors and reviewers. Please ensure that all deadlines are accurate before proceeding.
You may refer to the example below when configuring your conference schedule. Once all dates have been entered, click Next to continue.
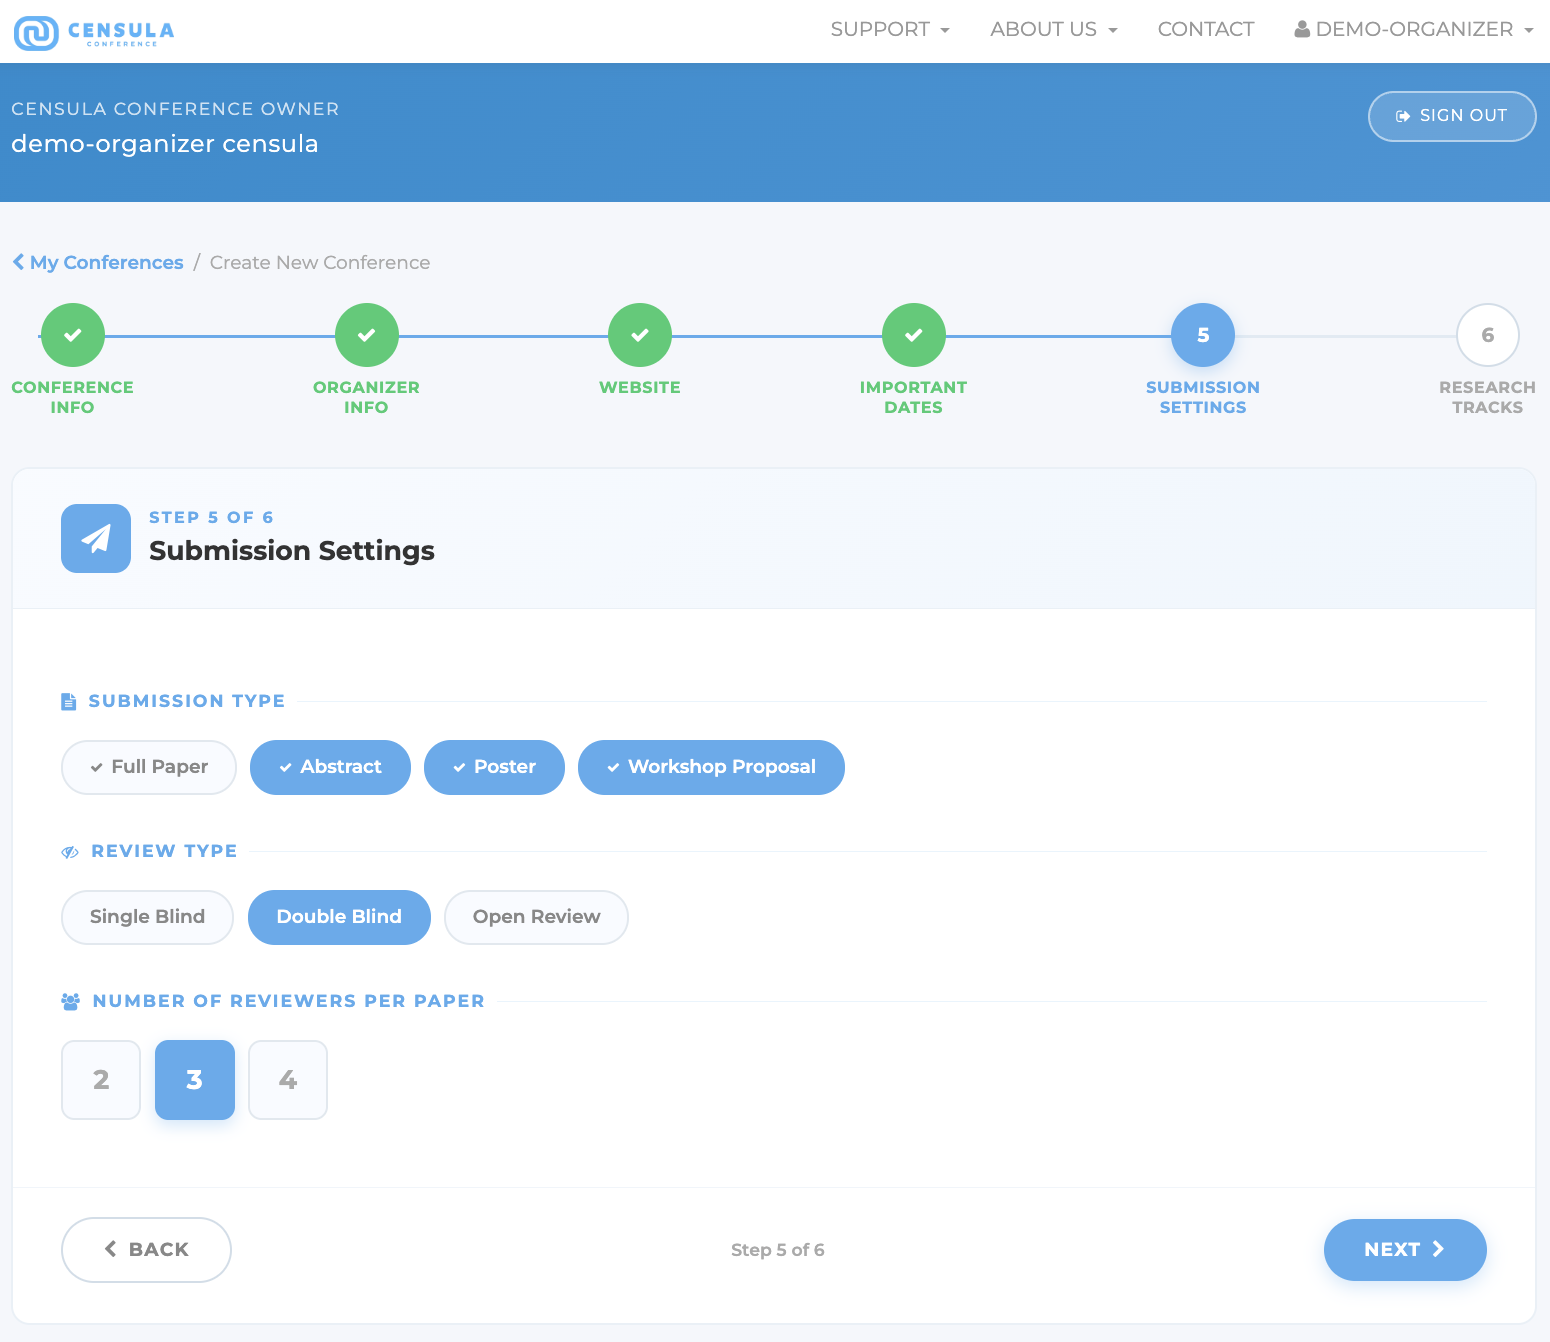
Step 7: Configure Submission and Review Settings
Select the appropriate Submission Type (e.g., Abstract Only, Full Paper, or Abstract and Full Paper), choose the Review Type that best fits your conference workflow, and specify the Number of Reviewers required for each submission.
These settings determine how authors submit their work and how the peer-review process will be conducted throughout the conference.
Please review all options carefully and select the configuration that best matches your conference requirements. Refer to the example below when completing this section, then click Next to continue.
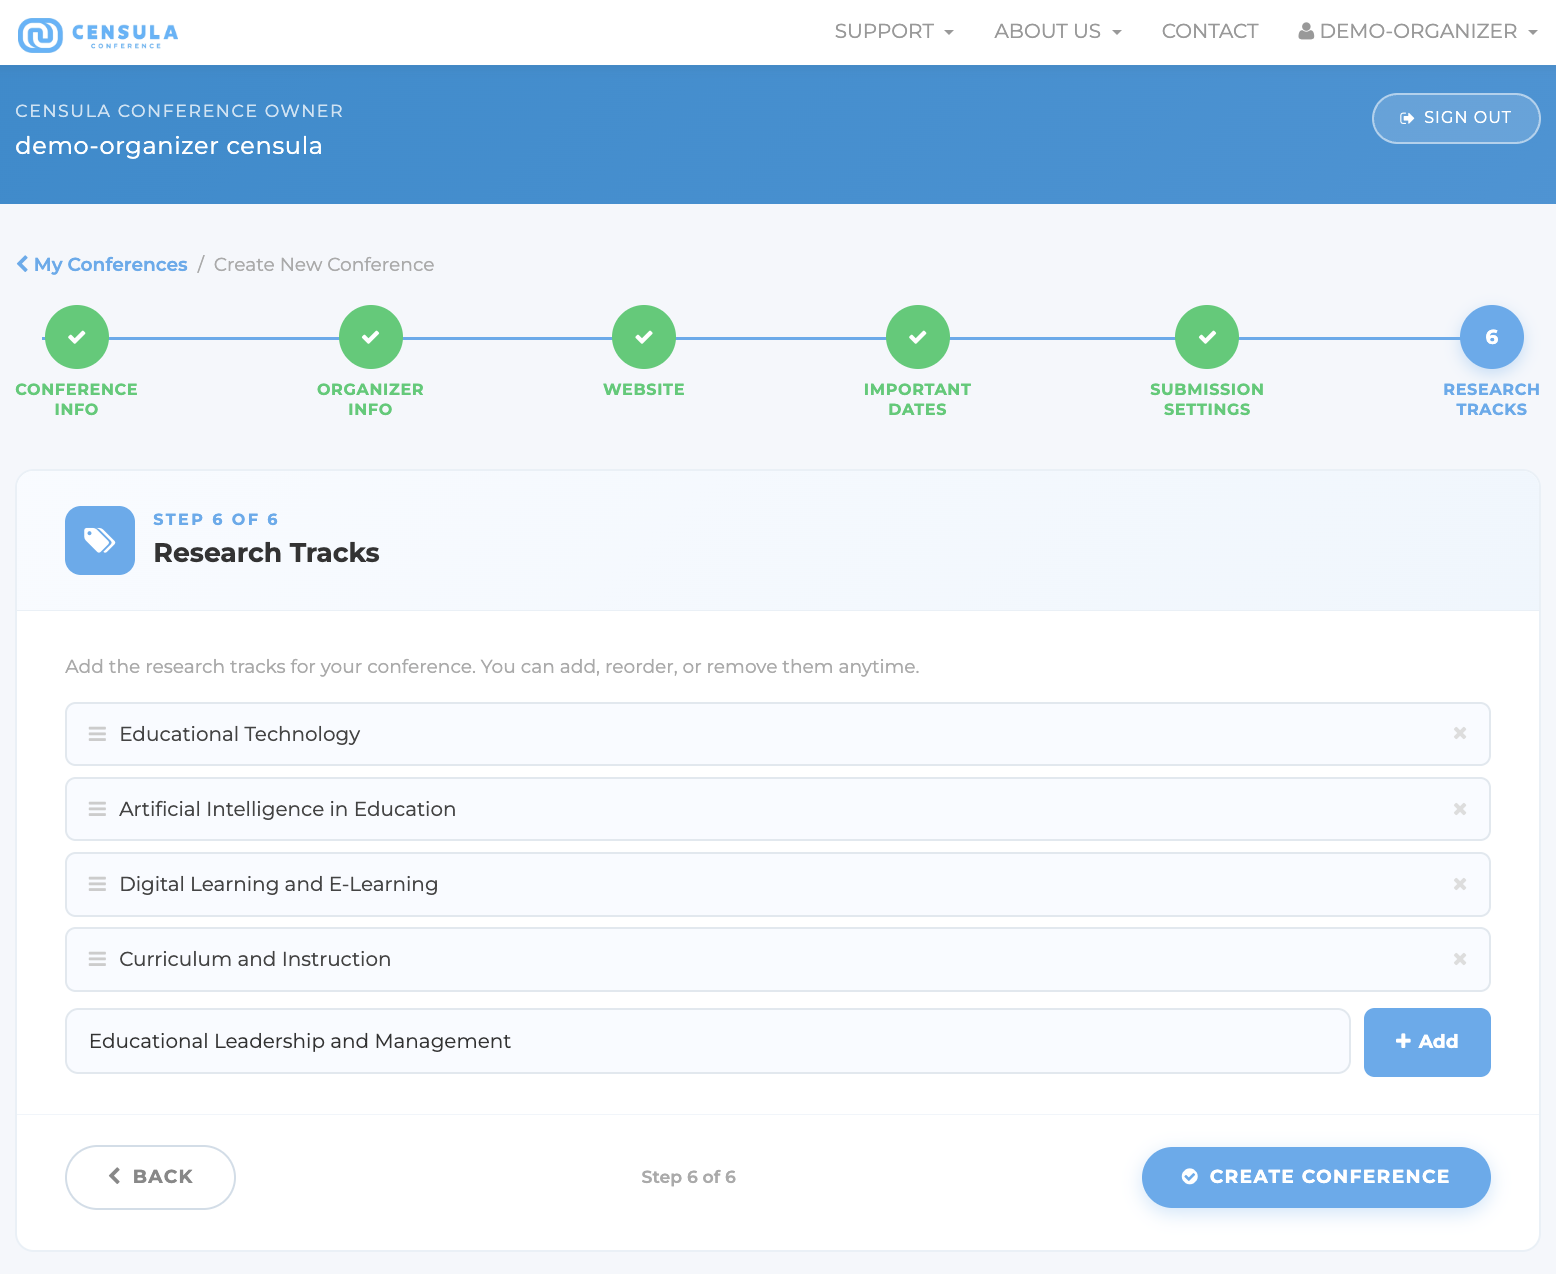
Step 8: Configure Research Tracks and Create Your Conference
Research Tracks help categorize submissions and make it easier to assign papers to appropriate reviewers. Examples include Artificial Intelligence, Educational Technology, Data Science, Engineering Education, and other subject areas relevant to your conference.
Add all tracks that apply to your conference. Authors will be asked to select the most appropriate track when submitting their papers.
Once you have finished configuring the research tracks, review all conference settings and click Create Conference to complete the setup process.
Your conference will then be created and ready for submission management, reviewer assignment, and conference administration.
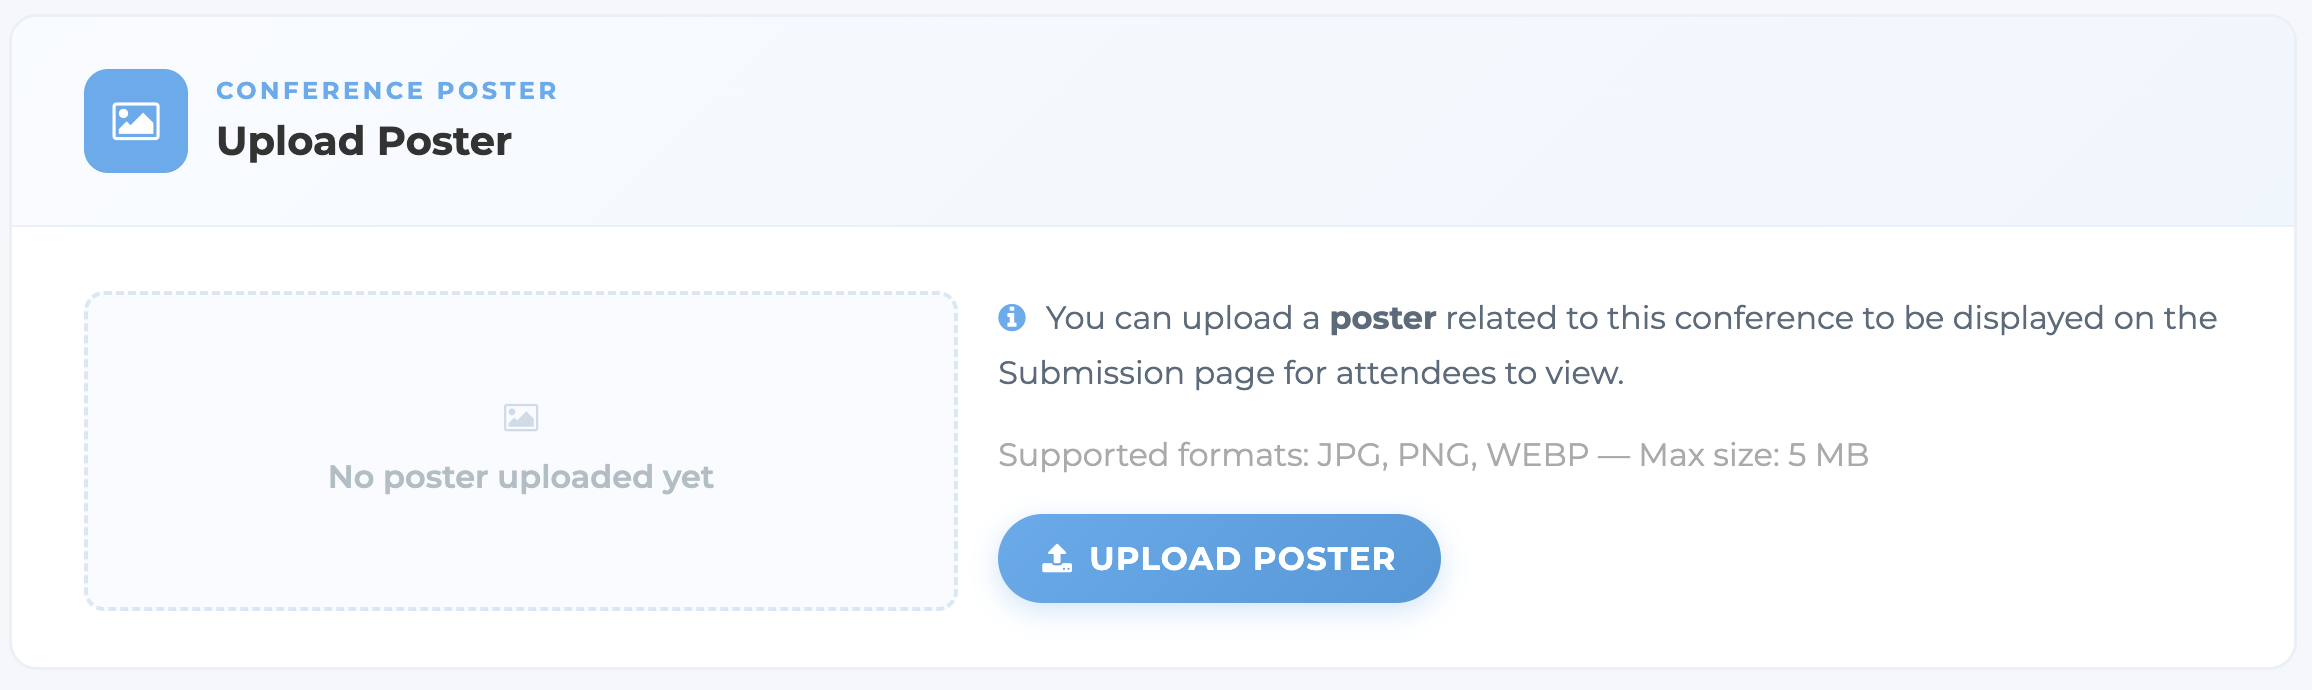
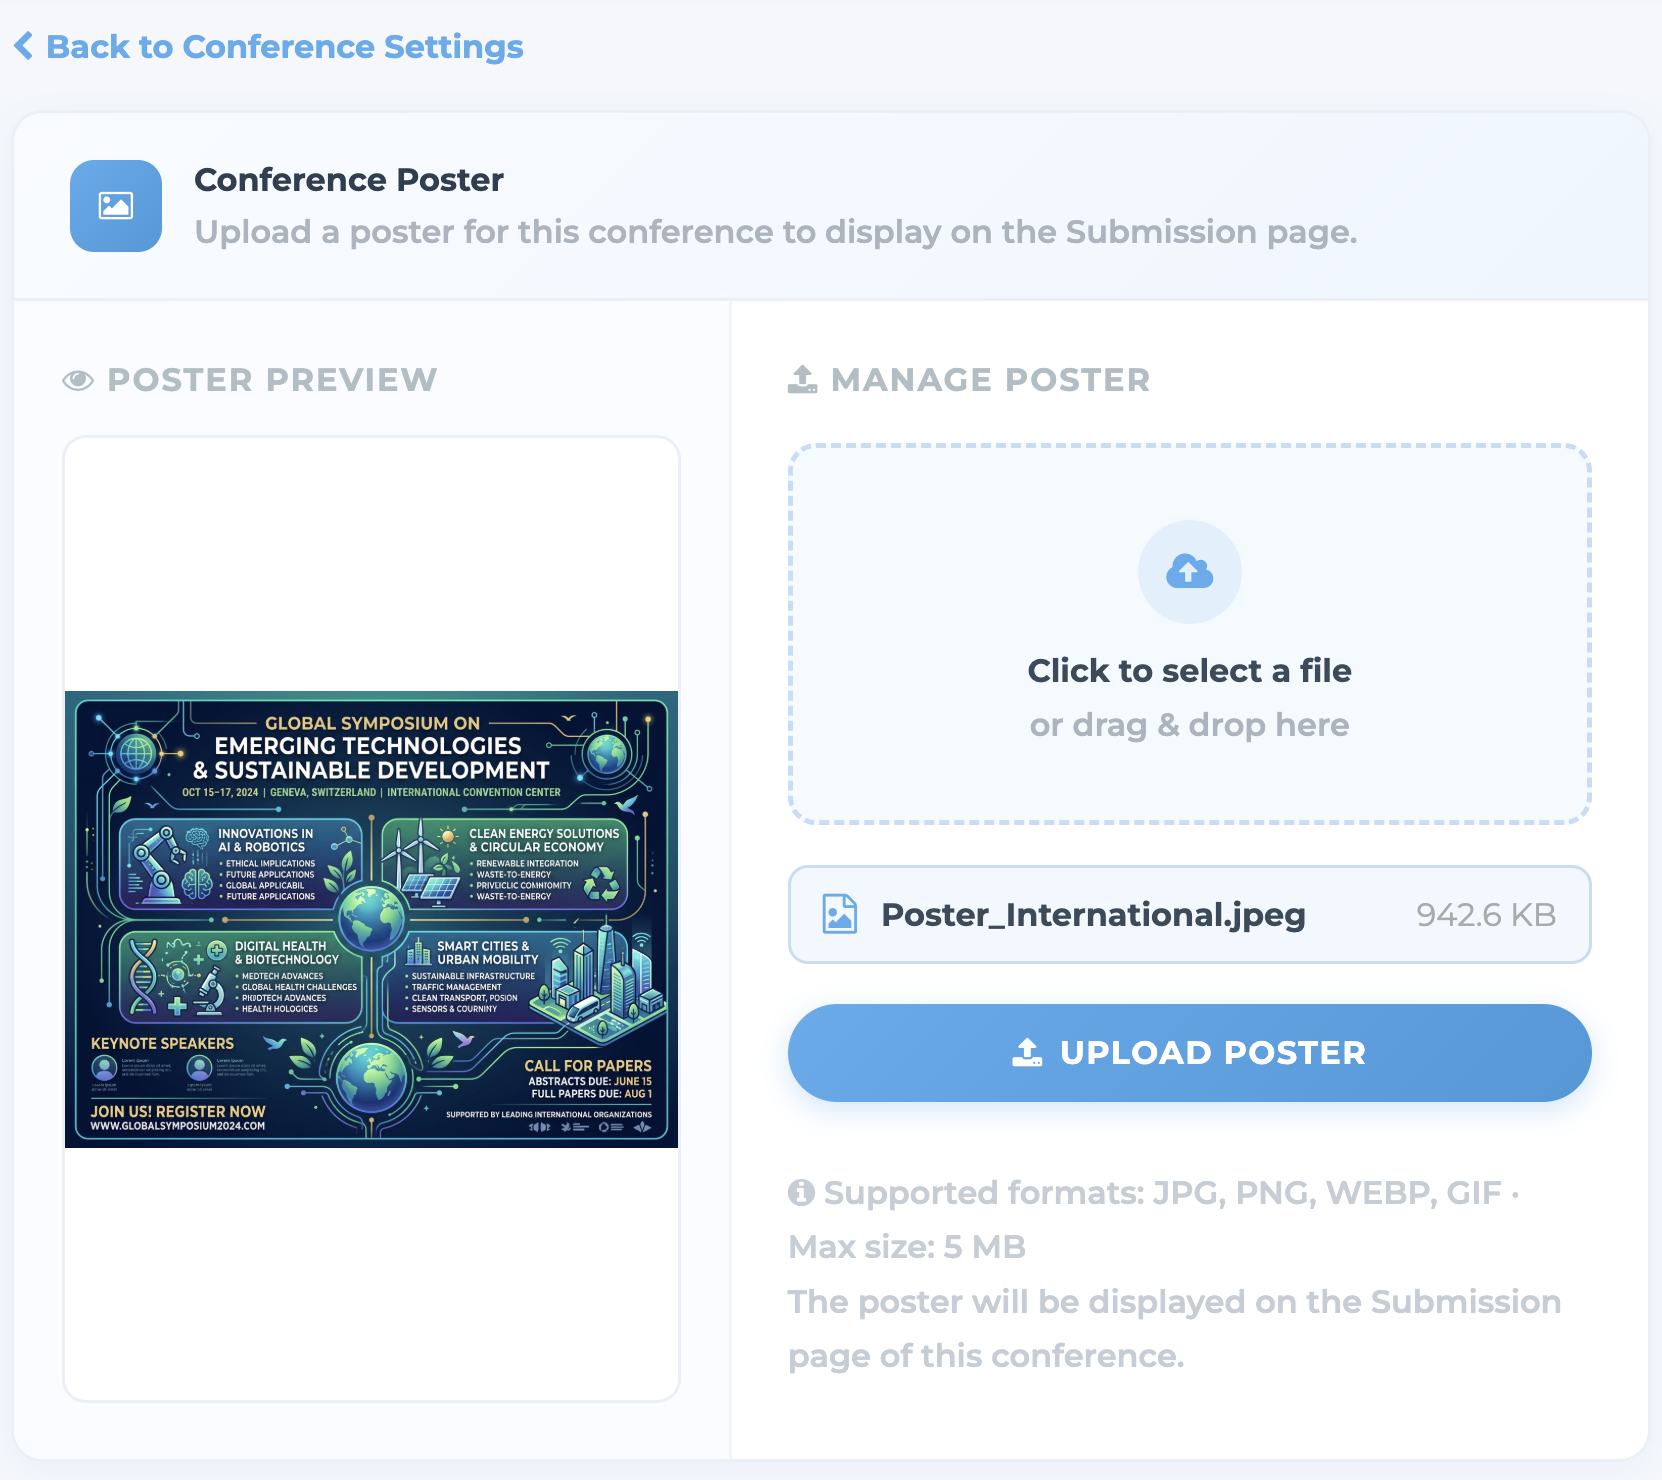
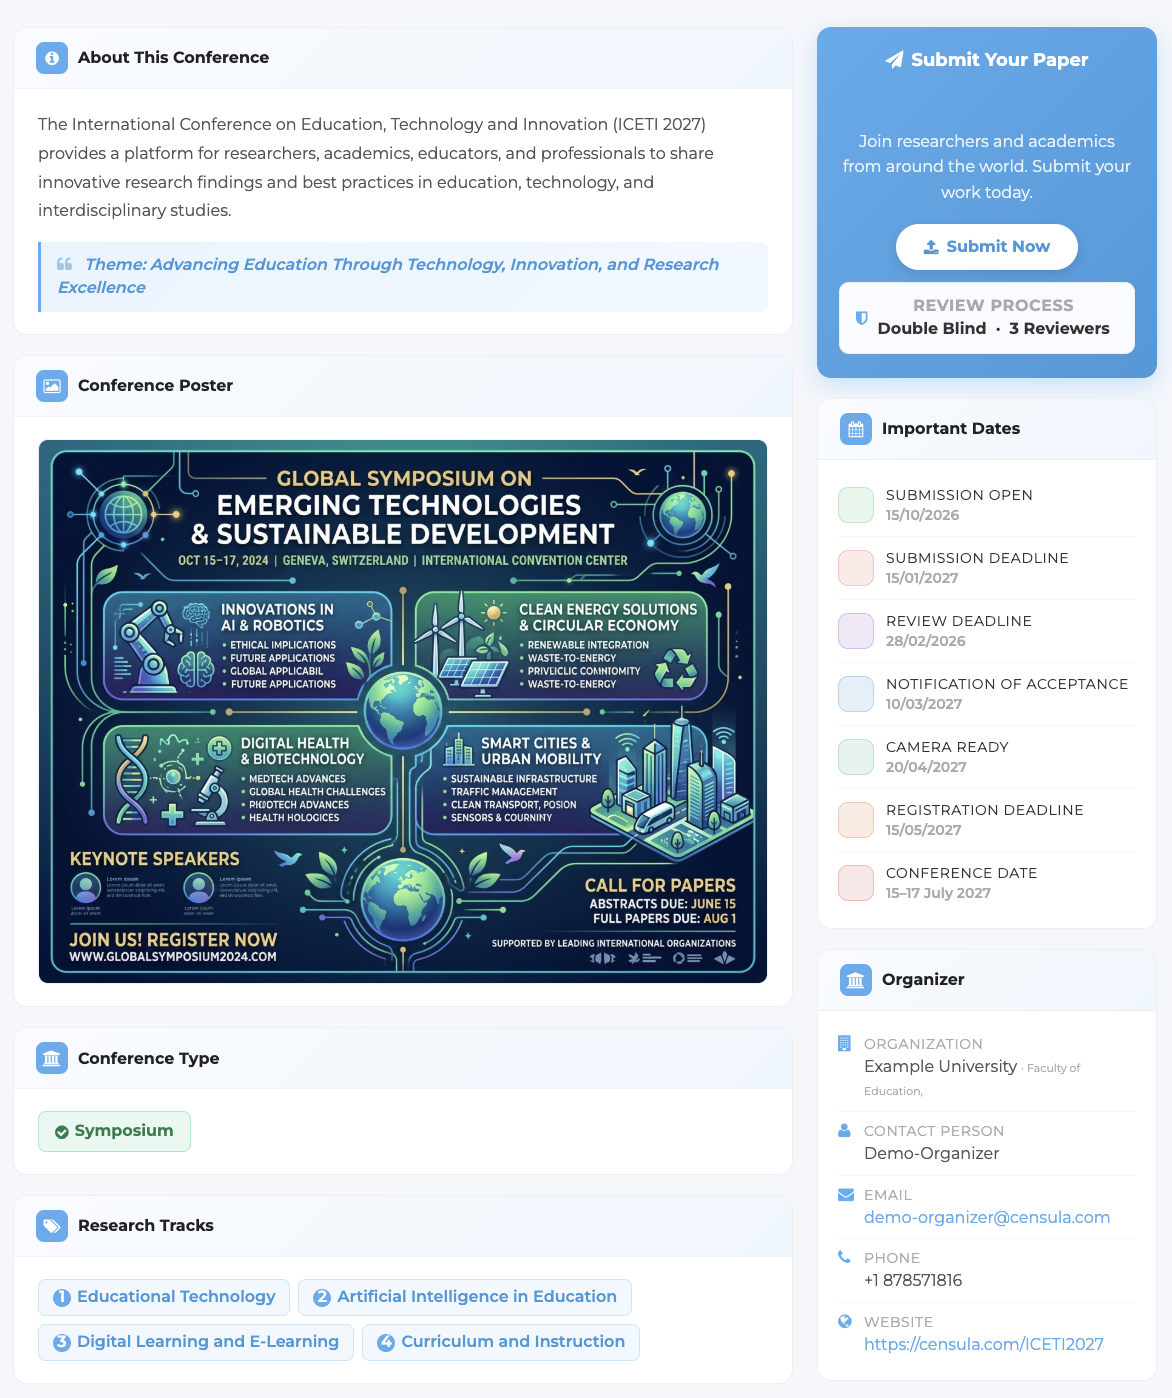
Optional: Upload a Conference Poster
Upload a Conference Poster
If you would like to display a promotional poster on your conference website, navigate to Conference Settings after creating your conference.
Scroll down to the bottom of the page and locate the Upload Poster section. You can upload a conference poster to provide additional information about the event, such as important dates, keynote speakers, venue details, sponsors, or other promotional content.
Once the poster has been uploaded successfully, it will be displayed on your conference website for visitors and participants to view.
This step is optional and can be completed at any time after the conference has been created.
Congratulations! Your Conference Is Ready
Your conference has been successfully configured and is now ready to accept submissions from authors.
At this stage, all essential settings have been completed, including:
You can now share your conference URL with authors and participants, begin accepting submissions, assign reviewers, manage the review process, and make editorial decisions through the platform.
The conference homepage should now display all configured information and indicate that submissions are open according to the schedule you have defined.
Note:
Your conference URL can be found in Dashboard → My Conferences → View.
After your conference has been created, a confirmation email containing your conference details and conference URL will also be sent to your registered email address. You may use this URL to share your conference with authors, reviewers, and participants.
* please check your Spam or Junk Mail folder.
Important Notes
- Organizers are responsible for all conference content and management activities.
- Conference information should be reviewed carefully before publication.
- Conferences that violate the Platform Terms of Service or Platform Policy may be suspended or removed.
- The Platform serves as a management tool and does not participate in editorial decisions.
Need Help?
Visit the FAQ section or contact support if you require assistance with any part of the conference workflow.